Every woman uses cosmetics, but many are not familiar with the correct sequence of applying makeup on her face, and this is precisely the key to a harmonious appearance and healthy skin.
- Basic makeup rules
- Makeup Sequence
- What is face contouring
- T-zone and cheekbone contouring
- Chin and neck correction with contouring
- Skin smoothing
- Eyebrow shaping
- Drawing arrows and eye contours
- Applying shadows
- How to dye eyelashes
- Lip contour drawing
- Lipstick selection and application
- The differences between daytime and evening makeup
- Common mistakes
- Makeup Tips
- Video on how to properly apply makeup
Basic makeup rules
On the basic principles built all the art of makeup. You need to be responsible for the selection of cosmetics: buy it in trusted stores, remember that good products cannot be cheap. Quality products will not cause problems with the application. Cosmetics at low prices often contain low-grade ingredients that can cause skin problems.
The individual features of the face should not be neglected. Not only the shade of the foundation depends on the skin tone, but also the color of the shadows, lipstick and blush.
A makeup base is selected that is suitable for the type of skin (oily, dry, normal or combination type) so as not to cause peeling or the appearance of acne. Owners of sensitive skin or women prone to allergies should study the packaging of makeup products especially carefully.
- Before applying makeup, you need to wash your face to cleanse your face of dust and sebum, even if they are invisible. Use special products (gel, milk, lotion) or just water at a comfortable temperature.


- If you plan to cover your face with foundation, then you must first apply the base and / or cream. This will save both make-up and skin.
- It is better painted in good light. If an event is planned indoors, artificial light is better, if outdoors is natural (if possible). Light should fall on the face uniformly from all sides.
- It is important that you follow the correct sequence for applying makeup on your face.
- It should be painted with tools specially provided for this: brushes, applicators, sponges that need to be kept clean, otherwise bacteria will multiply on them.
- The neck also needs care and corrective measures.
Makeup Sequence
The sequence of applying makeup on the face is respected so that the layers of cosmetics do not overshadow each other and do not smear as long as possible.
- Cleansing and moisturizing. Wash, if the skin is dry, sprinkle it with a moisturizing spray.
- Application of the base (in the absence of a primer, cream can be used).


- Skin tone leveling – applying foundation and, if necessary, concealer.
- Contouring and use of loose cosmetics: blush and powder for fixing.
- Eyebrow shaping.
- Drawing and shading shadows.
- Drawing and eyeliner, drawing arrows.
- Eyelash tinting.
- Lip contouring and lipstick application.
What is face contouring
Contouring (contouring, sculpting) is the technique of giving the face the desired shape and emphasizing the necessary features with the help of cosmetics.

This makeup method is based on the role of chiaroscuro – darkening or brightening a certain area of the skin, you can achieve visual correction.
T-zone and cheekbone contouring
A crucial stage that will emphasize all the beauty of a woman, if you follow the sequence of applying makeup and pay attention to the shape of the face.
It can be round, square, triangular, oval and heart-shaped – it is easy to determine if you look in the mirror. 
Contouring has general rules:
- Start from the nose – use the corrector to draw 2 lines on the sides of the bridge of the nose to the very tip. The more you need to lengthen the nose, the higher (up to the eyebrows) the lines begin.
- Bronzer darken the cavity under the cheekbone. She may be invisible. To determine its location, it is enough to draw a mental line from the ear to the edge of the lips – there is a depression on this line.
- Darken the forehead: from above, from the hairline, moving to the sides, apply a bronzer, outlining the oval of the face.


- Darken the area near the upper eyelids.
- Highlighting: Highlight the nose bridge (with a straight line between the already drawn dark stripes), the center of the forehead, the corners of the eyes and cheekbone (slightly higher than the bronzer).
- Brush the applied funds to make the face look natural. There should be no sharp boundaries.
There are additional recommendations for each face shape.
- Round. Such a geometric figure is drawn mainly due to the cheeks, so they should be given special attention: it is good to highlight the cheekbones, make the side lines longer. Also, the face is extended due to the clarification of the bridge of the nose (you can start the highlighter strip from the middle of the forehead), light “triangles” under the eyes closer to the nose and a light chin.
- Square. It is necessary to soften the clear “angles”: the lateral parts of the forehead and chin. It is more reasonable to darken the indicated zones, and to lighten the area around the nose (the triangle from the inner corners of the eyes to the lips).


- Triangular. To visually narrow the forehead, it will effectively darken its lateral sides. The smoother the chin lines, the more harmonious it will merge with the rest of the face.
- Oval. The most proportional type that does not require much contouring. If desired, you can correct the cheekbones with a bronzer or blush and darken the side of the nose to make it more accurate.
- Heart-shaped. With this form of face, one cannot be zealous with contouring the cheeks. A fairly light, not very dark line. As with a square face, a darkening of the forehead will work here, but dark lines should be avoided on the lower part of the face.
Chin and neck correction with contouring
Make-up of the chin will be the last step in creating the perfect face shape. If it seems too massive, it is darkened on the sides, and a highlighter is hired in the center and to the upper lip. For other types, the chin is usually made co
mpletely light and only slightly emphasize its contour with a darker tone. 
Many often forget about the neck, which is why it is knocked out of the general background, which leads to the idea – there are a lot of makeup on the girl’s face. It is necessary to take care of a smooth transition from the cheekbones to the neck. The foundation and powder are used, which mask small irregularities and wrinkles.
If the neck looks short or sagging, then the application will be the application of dark tones to the area under the chin. The pronounced hollow between the collarbones also looks elegant, so makeup artists darken it.
Skin smoothing
Before applying basic makeup to the face, make sure that the skin has an even, natural shade. Failure to comply with this step will disrupt the entire sequence of actions. To even out the tone, use foundation creams, bronzers or powder – the choice of tool depends on individual preferences.
- Powder. Its main role in makeup is fixing the cream foundation. The powder is suitable for everyone, because it does not harm the skin if you apply a foundation for makeup or cream on the face in front of it.


- Tonal means. Their pros and cons cause a lot of controversy. An absolute plus is efficiency, since a good foundation conceals almost any defects and protects the skin from adverse external influences. Minus – clogging of pores and obstruction of skin respiration. If the product is of high quality and applied correctly, then even girls with sensitive and allergy-prone skin can use it for daily makeup.
- Bronzers. This is a means to give the skin a tanned look. They will not work if you want to do light, light makeup (in this case it would be wiser to apply it zonally for contouring). They are applied on a tonal basis. There are crumbly and creamy versions. If the skin is oily and prone to acne, it is better to use a bronzer powder, if dry – a cream with a structure.
Level the tone in stages:
- Application of the base.
- Apply foundation with a sponge or makeup brush. The cotton pad should be slightly moist so that the cream does not remain on it (the wetter the sponge, the thinner the tonal layer). When applied, the product is distributed evenly, with massage or tapping movements. The exception is the cheek area, they apply foundation cream with light movements from top to bottom. It is important to pay attention to hard-to-reach areas – the wings of the nose, the area near the eyes.


- Removal of surplus. Use a dry sponge or napkin with a little wet face.
- Eyes. The area around the eyes is delicate, so a special concealer is applied to it a little lighter than the main tone.
- Fastening. If the makeup does not involve contouring, a fixing layer of powder is applied to the face – preferably with a brush.
Eyebrow shaping
If the eyebrows are put in order and there are no extra hairs around them, then it’s time to start applying cosmetics to them. The most popular products: pencil, lipstick and eyebrow shadow.
Pencil and lipstick are easy to use, proto are removed. Minus – the lines can look too sharp and unnatural , therefore it is better to choose not too dark shades.
- Brush your eyebrows.
- Draw a border within which to darken.
- With neat but confident strokes, color the eyebrow, darkening both the hairs and the skin.


- Remove excess strokes.
- Smooth the eyebrows again with a brush.
Shadows are a more persistent tool, but it will be more difficult to fix an unsuccessful makeup. You need to be careful with the amount of shadow applied so that the eyebrows look natural. The application process is identical to a pencil, only apply makeup with a special brush.
If you can’t adjust the eyebrows by plucking them with tweezers, you can purchase special stencils or contact the master-designer for long-term staining.
Drawing arrows and eye contours
Arrows help to enlarge the eyes and give expressiveness to the look.
Use 3 tools: eyeliner, eye shadow and pencil:
- Pencil – an option for girls with no experience in applying makeup. It is convenient and easy to erase. Less – it does not last as long as other cosmetics, and can crumble if you do not fix the edges of the arrow with powder.
- Eyeliner is a more resistant means, arrows with it are more expressive and accurate. To use it, you need experience. At first, you can use a felt-tip pen (it has a thin tip, it does not smear).
Arrows with shadows look harmonious, but because of the friable structure, it can be difficult for beginners to apply them strictly along the contour of the eye. Less popular remedy.
The rules for drawing arrows and eye contours are the same for any makeup.
- Bring the upper eyelid along the line of eyelash growth. Start from the inner corner or from the middle of the eye, depending on the desired result.
- Mark with a small dot where the arrow tip should end.
- If necessary, make the line thicker and smoothly connect it to the mark.


- Correct the “tail” of the arrow.
- Bring the lower eyelid as close to the eyelashes as possible. This item can be omitted if you need light makeup.
Applying shadows
Shadows not only decorate the eyes, but also are the basis for the arrows, allowing them to stay longer.
If the application tools are ready, you can proceed.
- Apply a base for eyeshadow for ever.
- Fix the layer with friable shadows of a light shade.
- Apply shades of the main color on the upper eyelid with patting movements. If additional shades are used in the makeup, then this should be the lightest.


- Apply dark shades over the outer corner of the eye and along the folds of the upper eyelid.
- Light shadows or highlighter to brighten the inner corners of the eyes and the line under the eyebrow.
- Shade without leaving sharp spots.
Carefully you need to use bright shadows and make sure that they match the color of the eyes and skin, and not the color of clothes and jewelry . The shade of shadows is selected according to the color wheel.
How to dye eyelashes
One of the easiest parts to make up.
- Take the brush horizontally.
- Start application from the outer edge of the upper eyelid, in smooth movements from top to bottom.
- Lightly twist the ends of the eyelashes to create the effect of open eyes.
- If desired, also make up the lower eyelashes.


- At the end, comb the eyelashes with a dry brush (special or washed from old mascara).
For thick and long eyelashes, any high-quality mascara is suitable. Owners of short and rare eyelashes should choose a tool with the effect of volume and length.
The shape of the brush is important: the length and density give a large number of villi on it.

 Do not miss the most popular heading:
 Hyaluronic acid in tablets. Benefits, how to take, reviews of doctors and effectiveness.
Lip contour drawing
Lip contouring is not necessary if they are sufficiently clear and voluminous. In other cases, contouring will hide their imperfections and complement makeup. For drawing use a special pencil.
Sequence:
- circle the hollow in the middle of the upper lip;
- outline the middle part of the lower lip;
- draw the sides and corners;


- shade the pencil with movements directed inside the lips.
You can slightly deviate from the natural line of the lips to give them the desired shape.
Do not miss the most popular article in the rubric: Plasma lifting face – what it is, how it is carried out, results, photos before and after the procedure.
Lipstick selection and application
When choosing a lipstick color, you should make sure that either the mouth or eyes are bright, otherwise the emphasis cannot be made on anything. Any lipstick is suitable for white teeth, but it is better not to combine shades of orange and brown with yellowish enamel. Also, the color depends on the clothes and the type of makeup (day / evening).
Application:
- perform lip contouring;
- apply the first layer to the lower lip, starting from the center and gradually reaching the corners;
- repeat with upper lip;
- get wet with a dry cloth;
- if it is not bright enough, apply another layer.
The differences between daytime and evening makeup
When choosing cosmetics, you need to consider what type of makeup you need, because there are significant differences between the day and evening options:
Daylight – light and natural. It shows the beauty and health of the face. Light shades, pastel colors are used.

Evening make-up is characterized by some heaviness, brightness. Usually prevailing catchy tones, black eyeliner, etc. Long in application, but more memorable.
Common mistakes
Every woman at least once made mistakes when applying makeup. What you should not do:
- neglect the makeup base;
- instead of a bronzer use a foundation darker than skin color;
- apply darkening agents not along the natural line of the cheekbones;
- lighten the tip of the nose with a highlighter – this will make it thicker;


- focus immediately on the lips and eyes;
- try to enlarge the lips with one lipstick, lowering the contouring.
Makeup Tips
- Professional makeup artists argue that the main thing in makeup is not to overdo it. Everything should look as natural as possible. For this, it is important not to skimp on good makeup and take into account the facial type.
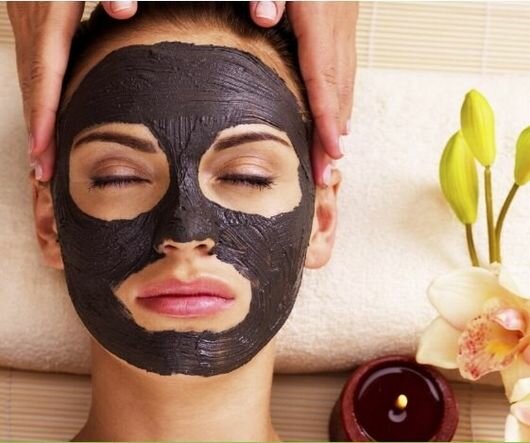
- A significant role should be given to skin care before and after makeup: washing, masks and peeling should be done regularly.
- The selection of high-quality cosmetics and tools – plays a significant role in the implementation of any makeup. It is important not to skimp on these things, because you have to use them on your own face.
Makeup is a process in which you can not do without practice. But even for beginners, there’s nothing complicated if you use good products and follow the sequence of applying cosmetics on your face and the rules of makeup.
Video on how to properly apply makeup
How to apply makeup:
Face contouring: