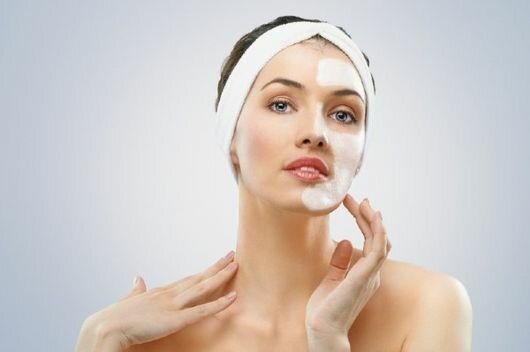
The arrows on the eyes give the look expressiveness and mysterious charm. Mastering the technique of their creation requires a lot of practice and learning the basics. For starters, you should read the tips for beginners from professional makeup artists.
- Rules and methods for drawing arrows
- Eyeliner
- With a pencil
- The shadows
- How to draw arrows – technique
- Classic thin
- Wide
- Double
- With cat’s eye effect
- Arrow shape selection by eye type
- For deep-seated
- For wide-set
- For those close
- For the little ones
- For large
- For asian
- For eyes with overhanging eyelids
- Useful tips from professionals
- Video on how to draw arrows on the eyes
Rules and methods for drawing arrows
The arrows in the eyes for beginners cause difficulties not only because of ignorance of the rules for drawing the main lines, but also because of the incorrect preparation of the eyelid.

Even high-quality and expensive eyeliners look untidy, if you do not prepare the skin correctly:
- It is necessary to make up and degrease the skin, you can’t try to apply eyeliner to the “stale” makeup, with which more than two hours have passed.
- Be sure to align the skin of the eyelid with powder with a transparent texture that allows the pencil, eye shadow or eyeliner to lie as evenly as possible.
- It is required to eliminate defects with a concealer, and then highlight the contours with shades of a saturated shade.
- The resulting base should be thoroughly shaded with a brush to get subtle transitions.
- The finishing touch will certainly emphasize the natural curvature of the eyebrows with mother-of-pearl shades.
A beautifully drawn eyebrow arch, applying the basic foundation are the most important steps for preparing the skin of the lower and upper eyelids for subsequent application of eyeliner:
- Arrows cannot be drawn with eyes closed or wide. The eyelids must be kept half-empty, which allows you to control the process.
- To bring eyes not in one motion, but in two stages: first draw a line from the middle of the century towards the temple, and then from the inner corner to the center.
Advice! If a step-by-step drawing does not help, then you should pre-apply the points, which then connect.
- Thickened tips are taken out in several stages: a line is lowered to the bottom arrow to form a triangle or an elongated “leaf”, which is then painted over.
- Eyeliner is always on the ciliary edge. The gaps between them are considered unacceptable. Correcting spaces allows the keelo that is placed on the eyelid.
- The tips of the arrows should be displayed at 3/32 – 6/32 inch and become a continuation of the century.
- The excess eyeliner is washed with a cotton swab dipped in a make-up remover.
Mastery must be in front of a large mirror mounted on a solid surface. The specific steps are completely dependent on the tool used for eyeliner.
On a note! There are many varieties of arrows, but correctly drawn lines must be thin at the beginning of the contour and at the end of the tail.
Eyeliner
The arrows on the eyes, for which girls who begin to practice the art of eyeliner, use a liquid base, can be created in any form. The consistency of the cosmetic product should not be too thick or too thin. The silkiness of the texture is easily checked on the hand by holding a test line on the skin. 
It must be applied easily and continuously, without curling or rolling. One of the most popular is Vivienne sabo Charbon eyeliner, and Catrice Liquid Liner Waterproof is recognized as affordable in terms of price and quality.
It is not recommended to take too thin, rare or soft brush. It should be of medium length, have a sufficient diameter and be moderately stiff.
Step-by-step instructions for applying traditional arrows:
- A thin contour line is drawn from the middle of the upper eyelid. It can turn out not absolutely equal.
- When the brush reaches the outer edge, it winds up. By the end of the drawing of the ponytail, the hand is weakened and switched to hatching.
- A line is drawn from the outer contour along the bottom. It is indicated by a dotted line.
- The resulting tail is filled with eyeliner. Again, go along the upper arrow to adjust the thickness and smoothness of the line.
Step-by-step drawing of arrows from the outer corner to the inner:
- Draw the bottom line. It is drawn from the outer corner towards the temple. It should be curved outward. No thickenings. One clear line.
- Complete the ponytail. The upper line is lowered to the middle. To avoid errors, the connection is carried out at points, one of which is placed in the middle of the upper eyelid, and the other – at the end of the lower contour of the tail.
- From the center draw a line to the inner corner. It is drawn with a V-shaped contour. Once again, go through the lines and fill the tail with eyeliner.
Advice! It is necessary to wait until the eyeliner is completely dry.
With a pencil
For beginners, the easiest way is to learn to bring eyes with a pencil, which makes it possible to correct any flaws. You can take a soft or harder pencil. Cosmetic brands such as Maybelline, Guerlain and Bourjois make the best eyeliner pencils. 
The main thing is to sharpen the stylus well, but without fanaticism, the diameter of the tip of the pencil should not be less than 1/32 inch. Otherwise, there will be a risk of scratching the delicate skin of the eyelid.
Classic arrows are drawn with a pencil according to the following scheme:
- from the middle of the ciliary upper row draw a thin line;
- draw a tail, but it can not be made too long;
- with a smooth stroke, the tip of the tail is connected to the main contour;
- the arrows are trimmed with a cotton swab.
On a note! The beginning point of the tail is the center of the lower eyelid. You need to start the arrow with the thinnest line.
Other types of arrows are drawn with a pencil:
- Thin. Apply exclusively sharpened stylus, drawn in the closest proximity to the eyelash growth line.
- Thick ones. They require the use of soft cosmetics, which need a little shade.
- “Cat’s look.” Drawn with soft fat stylus. A dry pencil is not suitable. The lines should be wide enough, but clear.
- Colored. They look spectacular in an evening look, but are created by sequential application of the first base line, over which another another color is painted. You can also draw arrows with a smooth transition from one color to another.
The shadows
For beginners, drawing arrows in the eyes with shadows can be more difficult to cope with than those who use a pencil. The lines are applied with a special shading brush with a thin beveled tip. Makeup artists advise to start the practice with dry shadows, and when the technique is mastered and perfected, move on to using liquid and cream products. 
Step-by-step instruction:
- apply the base base on the eyelid and blend it;
- moisten the brush, remove excess moisture, gain a little shade;
- spend the tool along the upper line of eyelash growth;
- stretch the brush from the edge of the eye up, drawing a small line;
- pass along the arrows several more times until a contour of the desired thickness is obtained.
To achieve a smoky effect for evening make-up, you can shade the shadows closer to the outer corner of the eye with a thicker flat brush.
Advice! They proved to be excellent in creating smoky eyes make-up shadows-palettes from GOSH and RIMMEL, eliminating the need to choose shades, since all the right colors are available in one small package.
How to draw arrows – technique
Beginning girls often make gross mistakes when drawing arrows on their eyes – they apply eyeliner on the eyelid without any foundation for hand makeup on the weight. The base layer of powder, foundation, eye shadow does not allow eyeliner to flow. The lines drawn on the weight are torn and uneven. To prevent the hand from trembling, the elbow should rest against a hard surface.
On a note! Watching how the masters work, beginners begin to draw arrows with their eyes closed, and the result leaves much to be desired. To make an eyeliner in this way, you need to train at least one year.
Classic thin
Created by a well-sharpened pencil or eyeliner with a thin brush. You can draw such arrows in the shadows, but they will look less impressive even with daytime makeup and will not be expressive enough.
Step-by-step execution technique:
- from the inner corner to the edge of the eye draw a thin clear line;
- a tail is drawn from the outer corner;
- the end of the arrow is connected to the main circuit;
- arrows adjust;
- bumps are removed with a cotton swab.
Wide
Drawn in shadows with a dry or bold texture. To enhance the brightness, it is recommended to moisten the brush – the reception allows you to increase the concentration of pigments and significantly improve the final result. 
To create wide arrows you need:
- draw a contour along the upper eyelid to the very edge;
- draw a curved line from the outer corner of the eyes;
- finish the tail with the top stroke from the middle of the century;
- walk over the drawn line again;
- Fill the completely outer tail;
- draw lines to the required width.
Too thick arrows are corrected with a cotton swab and makeup remover.
Double
Performed in retro or egyptian style. Double arrows make black or using several shades.
To draw double arrows, you need:
- draw a line from the middle of the century or the inner corner;
- bring the arrow to the edge and point up to form a ponytail;
- draw a line along the lower eyelid;
- draw the bottom tail parallel to the top.
The end of the retro-style arrows is lifted and slightly lengthened. The Egyptian image requires a horizontal arrangement of the upper and lower arrows.
With cat’s eye effect
The smoothness of a slightly curved contour and ponytail is best created with greasy rather than dry eyeliner. 
The technique of performing “cat’s eyes” involves:
- drawing a thin outline on the growth of eyelashes along the upper eyelid;
- drawing an oblique line from the outer corner of the eye up;
- drawing a line from the end of the arrow to the middle of the eyelid;
- connecting the resulting triangle to the corner of the eye with a line having a width of the desired thickness;
- painting the tail and the entire space between the lines.
Advice! To make the arrow have an even tail, use a ruler. It is placed at the desired angle and draw a line.

 Do not miss the most popular article in the rubric:
 Facial massage according to the Japanese doctor Asahi Zogan.
Arrow shape selection by eye type
The arrows on the eyes should emphasize the advantages and hide the flaws, therefore, for beginners to master the skill, first of all, it is necessary to learn to take into account the anatomical features, since without this it is impossible to correctly choose the thickness and length of the lines.
For deep-seated
Slightly covered by overhanging eyebrows and deep-lying eyes must be made more expressive and bright, but without weighting the look. The upper eyelid is emphasized with thin lines exactly in the direction of eyelash growth. 
The arrow must be brought up, almost closer to the corner of the eyebrows. Ponytails cannot be made massive. To visually push your eyes forward, the lower eyelid is brightly brought.
Important! Professionals do not recommend using eyeliner, you should also abandon the pencil and black eyeshadows. The bottom line is best to start drawing from the middle. It is allowed to connect with the upper arrow.
For wide-set
It is necessary to make arrows that visually bring the eyes closer to the bridge of the nose, and not move away from each other. Contour lines must be drawn from the inside to the outside corner. Elongated tails are not suitable for owners of wide-set eyes.
Thick arrows perfectly emphasize the shape of “cat”. The main highlight is not only the width, but also the mandatory allocation of the inner corner of the eye with a V-shaped line.
For those close
Eyes that are too close to the bridge of the nose require a visual extension of the shape, which gives the impression that the distance between them is much greater. The upper arrow must be drawn from the middle and displayed outside the outer corner. The lower eyelid is emphasized by a thin arrow with a tail a little shorter or the same length as the upper one.
You cannot connect the arrows at the end. Between the upper and lower ponytails draw lines with a light pencil. This finishing touch visually lengthens the eyes and gives makeup completeness. Without dividing the double arrows with a white line, the eyeliner will not look harmonious and neat.
For the little ones
Small eyes should not be too thick lines. They
must be subtle classic. To give the look openness and expressiveness and make the eyes visually larger, it is necessary to abandon the dark eyeliner for the lower eyelid. 
It is better to use silver or golden shades. The upper eyelid can be brought in black, which creates the necessary contrast between the upper and lower eyelids, helping to correct the section of the eyes.
For large
Too large eyes, and especially convex and round, require visual reduction and lengthening. Do not leave the mucous membrane of the lower eyelid unpainted. It must be stained with dark color. A win-win shape for round eyes, according to makeup artists, is retro with a wide smooth tail.
For asian
Owners of a narrow section of the eye do not fit too wide lines that make the look even more “hidden”. Thin arrows with a slightly raised tip that do not go beyond the outer corner look win-win. 
Thickening should be in the middle of the ciliary row. The lower eyelid is allowed to be led exclusively along the edge, and the tip of the lower contour must be connected to the upper one. To give the look depth and openness, the mucosa of the lower membrane is clarified with a white pencil.
Do not miss the most popular article in the rubric: Face fitness for lifting the face contour, rejuvenation, muscle tone. Master class from Elena Karkukli
For eyes with overhanging eyelids
A slightly falling eyelid leads to the formation of folds and gives the look a sad and tired look that needs to be refreshed. Lines should make the eyelids lighter. To draw an arrow, you need to be thin with a thickening at the end.
The tips are drawn from the place where the eyelid begins to hang, which visually smoothes the swelling and raises the overhanging fold. The tail must necessarily form a triangle with a slight slope, not have a strong bend or be too long.
Useful tips from professionals
The arrows in front of the eyes with an impeccable even contour for beginners are the ideal that every representative of the fair sex strives for, and following the following recommendations allows you to get a similar result:
- Practice should be in front of a rotating medium-sized mirror with backlight. It allows you to adjust the viewing angle. It is impossible to make clear, continuous lines without proper lighting.


- Experts advise beginners to start by applying small strokes, the contour connection of which allows you to correctly draw a line. Ponytails are drawn on round dots.
- The best solution for mastering the skill will be a stencil. Templates are sold ready-made or can be made independently. Kylo is applied to the eyelid and stained along the contour line, and then filled.
- Among the improvised tools, adhesive tape is suitable, which is glued to the outer corner of the eye, draw a line along its line, and then remove it. Some even experienced girls in eyeliner use a spoon that has a perfectly rounded edge.
- The inner shell of the lower eyelid should not be neglected, the staining of which with a light eyeliner allows you to visually enlarge the eyes, and black, on the contrary, reduce it.
On a note! Makeup artists do not recommend tinting the lower eyelid after a sleepless night or severe fatigue, this will only emphasize fatigue and staleness.
Recommendations :
- Thin lines are ideal for everyday and business makeup.
- Wide arrows and “cat eyes” are appropriate in the evening look.
- Owners of blue eyes should make arrows of blue, beige, silver, gray, turquoise. It is advisable for brown-eyed girls to choose green, beige, black, turquoise shades. For women with green eyes, arrows fit in black, lilac, brown, and purple eyeliners.
- Massive fair-skinned blondes do not suit black massive arrows. Girls with golden hair should focus on blue, brown, gray palette and color variations.
The following errors should be avoided:
- Never start to draw a contour from the inner corner. Such a technique requires a line to be drawn, which increases the likelihood of creating an irregular or intermittent arrow. You always need to step back a bit from the corner, then draw it additionally.
- Do not erase the line, which turned out too far from the ciliary row. To fix such a flaw, dark or color-matched shadows are allowed that apply and slightly shade.
- You can’t wash and draw arrows several times in a row. This provokes redness and “fatigue” of the century, which will be difficult to refresh.
The arrows in front of the eyes, if you follow the master classes for beginners, turn out to be impeccable, but exclusively for those who practice a lot and daily. It is necessary not only to hone the technique of summing up the eyes, but also to choose the right shape, thickness, color of lines that are ideal for facial features and complement the image.
Video on how to draw arrows on the eyes
How to learn how to draw arrows with a pencil:
How to draw arrows on the eyes for beginners: